
Hi,
Remember the wooden red Tornado I was planning to restore ?
Well, due to circumstances it didn't make it.
So, all that was left was mast,boards, rudders, boom, beam and sails.
To my surprise a very nice guy ,who knows my sailmaker, called me
and told he had found a neglected T in a ditch and he found the
owner. He needed a mast and other hardware .
So we went together to pick the cat up. And split the merchandise.
Thank You Misha !
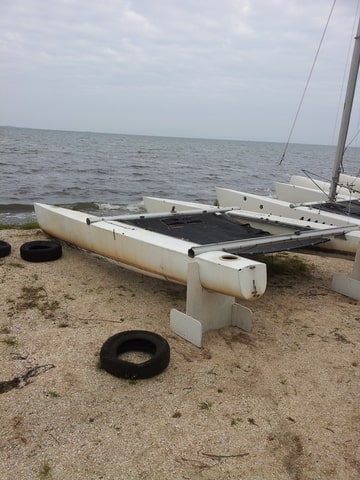
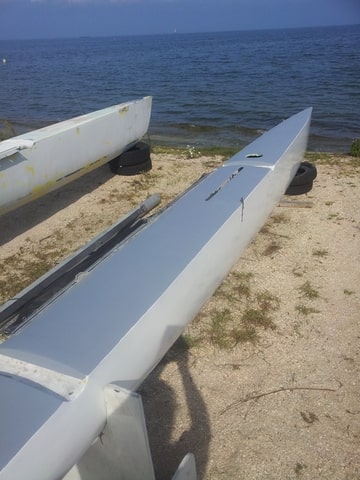
We towed it out of the ditch with my volvo 😀
It was supposed to be a balsa-wood / epoxy cat.
It came with beams and a good trampoline but in sorry
state, because it had been in the water for years.
With help from a club member we started sanding .
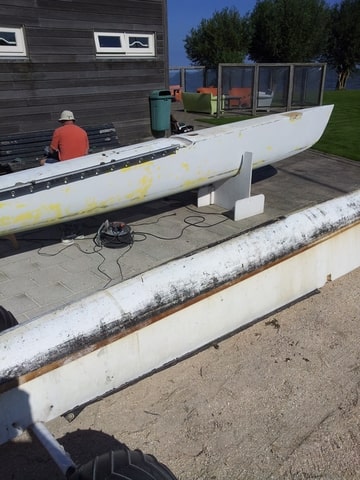
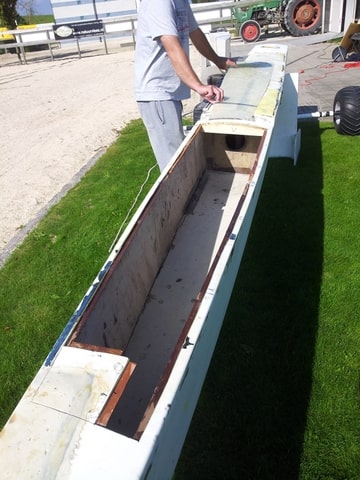
To find a rotten fore-deck in the port hull. The other hull is sound.
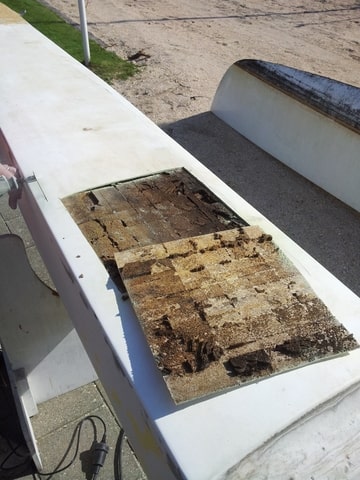
So, we took it out. To discover its an epoxy T, with a balsa/ epoxy
deck.
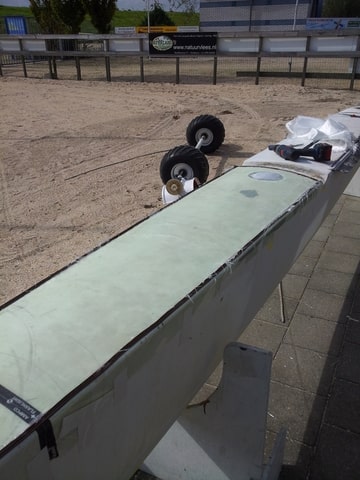
We kept the upper-deck as a template.
And started rebuilding.
Hope to have the deck finished in 4 days, after that its paint.
Fingers crossed for a indian summer. Wanna sail this T asap !
Sold the P18-2 yesterday to have some resources rigging the T.
While sanding, we didn't find a vin-number or brand-name,
only it has sailspar beams and mast, so we decided its a "russian" Tornado
witch had a wealthy owner and rigged it in Britain 🙂
André
Edited by catmodding on Sep 07, 2014 - 11:59 PM.
André de Bruin, Amsterdam,the Netherlands
P 18-2
Take lots more pics of the process. Looks like a great project. Nice job of saving a great boat!

Maybe an early Reg White Tornado? I have one with rotten decks around the port holes.
H18m
p16
Venture15

Looking at that list of your boats Pete, I'd suggest counseling. You obviously have an addiction.
Dave

Looking at that list of your boats Pete, I'd suggest counseling. You obviously have an addiction.
how many do you own?
MN3
pknapp66 wrote: Maybe an early Reg White Tornado? I have one with rotten decks around the port holes.
Dont't know if its an Reg White, it probably is, given the fact it has SailSpar beams
and mast, like the idea its a Russian boat tough. 😀
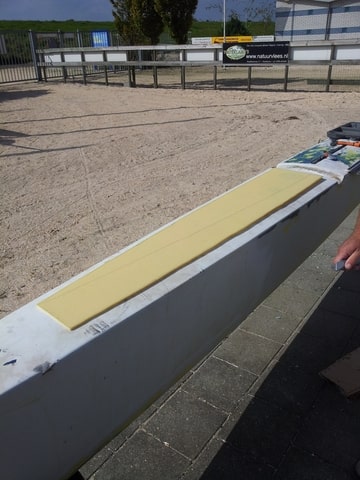
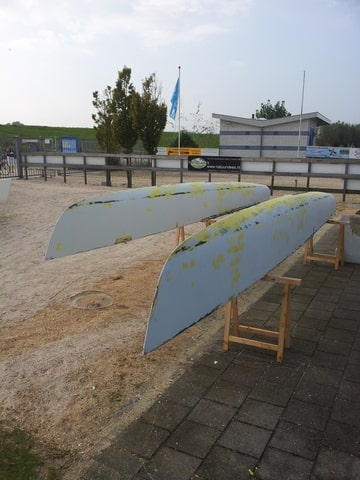
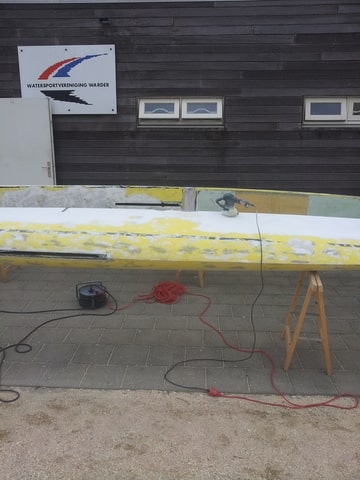
Finished sanding the hulls with 80 grain today, boy, this cat has had a lot
of colors!! The original color was yellow .
Yesterday we tried to make a new under deck from okumé -ply, didn't work,
we could not bend it into shape. Working with bend frames made it to heavy.
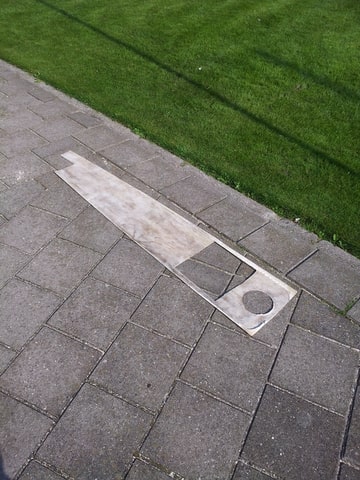
So I went to a pro, he advised me to use the good hull front-deck as a template
by covering the good front-deck with a plastic-foil and glass-fiber and epoxy
that. After curing there's a perfect deck shape in glass/epoxy.
We start on that tomorrow, wil make pictures.
André
Edited by catmodding on Sep 08, 2014 - 06:51 PM.
André de Bruin, Amsterdam,the Netherlands
P 18-2
The 16s are gone, but I was supposed to pick up a hobie wave today 🙂 Unfortunately, the skeg was split in half; looked like a peeled banana. Man, it was a 2009 and owned by a yacht club/sailing school. Had nearly new sails. I guessed it was dragged around just a bit on the rocks. Lot of driving for nothing.
Anyway, looking forward to the pics. Cool idea about molding the deck from the good one. Document that one well. I remember reading about guys peel off damaged decks on some of the nacras, but they were able to order new decks from the manufacturer. Not sure this is still the case on some of the older boats, so this would be a great alternative.
Currently 6 ready to sail and 1 tornado project. In my defense the H18 magnum is in the classifieds,but I am
Considering an H21 SE project. My name is Pete and I am an addict. There I took the first step. I don't own a Nacra....
H18m
p16
Venture15
My name is Steve and I am addicted to sailing.
3 ready to sail and a 22 foot MacGregor in the works...
Wife wants to sleep on the water.
What can I say?
To much rain today, (unexpected) and work ..
Tomorrow sanding in 125 grain and maybe 300's
Still trying to get the "replica" set together, foam
and epoxy-resistant foil.
André
André de Bruin, Amsterdam,the Netherlands
P 18-2
Hi,
so, went to a professional boatbuilder-shop today and bought;
Some foil to cover the deck.
Pre Impregnated foam 5mm.
3 Kg of epoxy.
Boy, now I know why light-weight racing yachts are so expensive !!
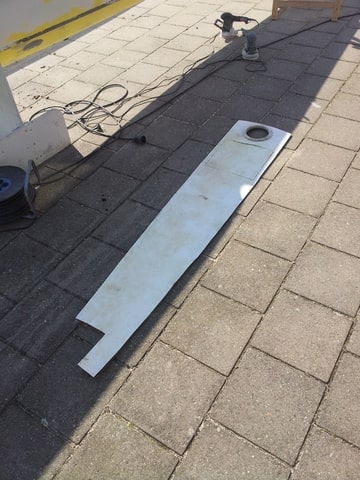
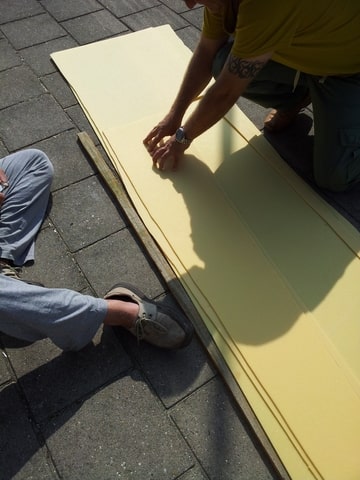
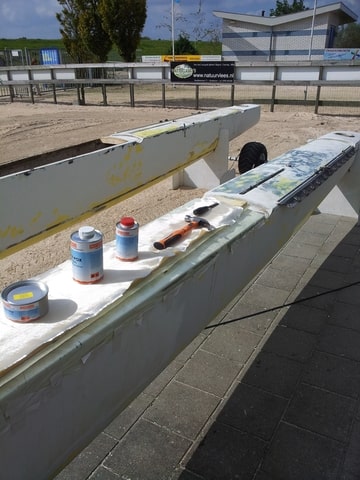
We started spanning the foil over the "good" frontdeck
Then, like some proper "Hans Brinker" Dutch guys we made some
dykes to prevent the epoxy flowing all over the place.
We used anti-draft tape used for door and windows.

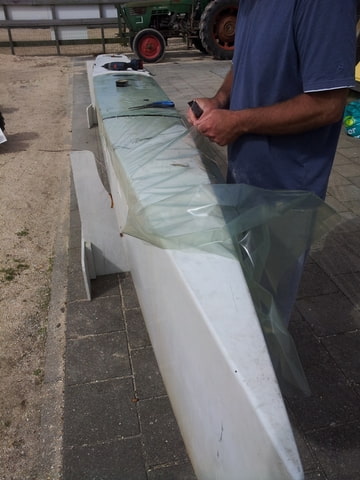
Then cut 3 layers of glass into shape.
Epoxied them to the foil. Sorry, couldn't make foto's, my hospital-
gloves were soaked in epoxy. 2 layers of 280 gr/sqm , 1 of 380 gr.
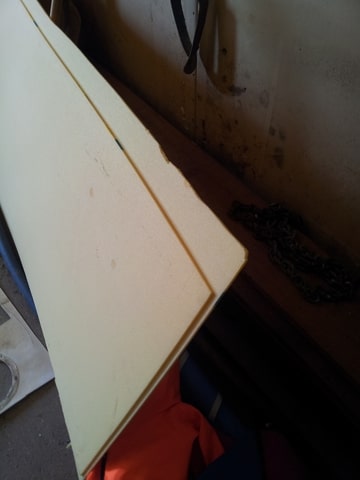
Now, as for foam. There's two sorts of pre impregnated foam,
one is made to " bake of " after its put in shape.
I bought the one that can be "cold cured " its 5mm and expensive.
They only sell it in standard ply-wood size.
Gonna donate the rest of it to club-members in need.
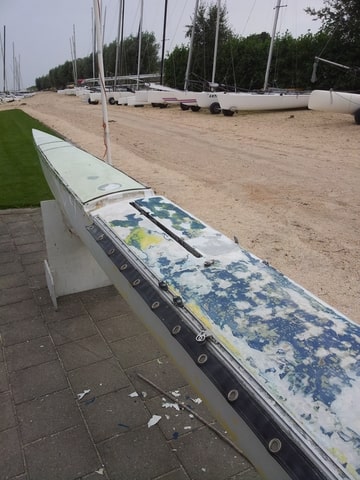
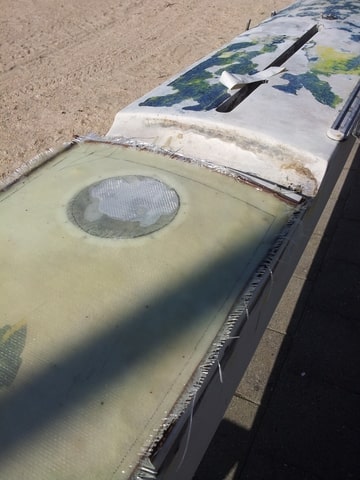
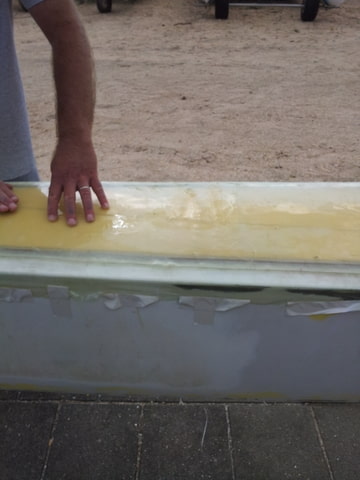
After al the precious work today, my mate gently stabbed a knife
in a decks gelcoat-crack, only to discover the previous owner(s) put
at least 3/4 layers of rubbish on the original deck. Gelcoat is absurd !
Thick and heavy .
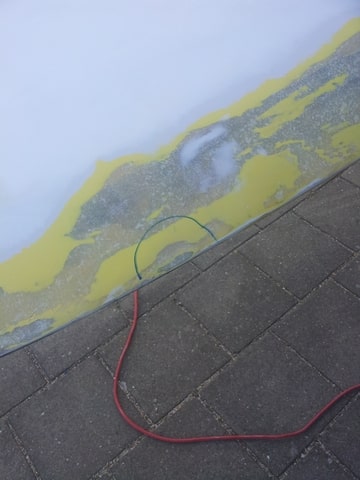
So next job is stabbing the decks clean and sand till its yellow-ish..
After this the T has lost a lot of weight !
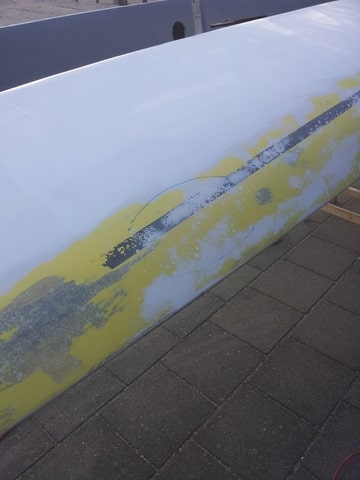
Especially the blue paint is something very low-budget. The gelcoat
didn't stick to it and it didn't stick to the epoxy-deck. So we can stab
off most of it away.
Keep You posted, André
Edited by catmodding on Sep 10, 2014 - 09:42 PM.
André de Bruin, Amsterdam,the Netherlands
P 18-2
Like
André,
This is awesome!
I'm sad that you had to sell the P 18-2, but to build this rocket - totally worth it!
As usual you are doing a great job of documenting it for us.
Bob
Hi,
Yesterday started a bit disappointing , 3 layers of glass is
not enough to make sturdy a deck, it was floppy like a
mousepad.
So I added 2 more layers and went walking the dog.
I recommend at least 6 layers of glass if some-one ever
gonna do this.

The next day the deck was a lot better.
We kept the old deck as a template.
To draw the required size on the new deck.
And cut it to the right size.
I was wondering it would fit inhere.
Well, it fitted like a glove !! And has the right curve.
We needed a screwdriver to get it out again !
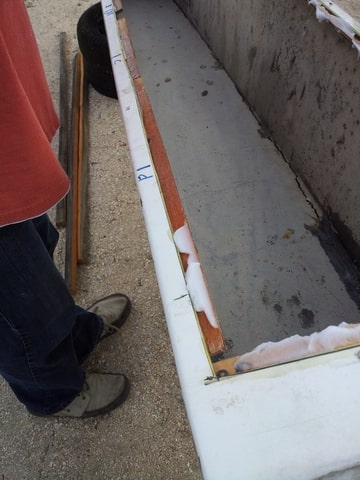
A glass only deck isn't strong enough, so we are gonna
strengthen it with foam.
The flange(?) we made on the bad hull is about 2,5 cm.
Using the old deck as a template, we cut out the foam minus
the 2,5 cm on all edges.
Again, we used the sound hull as a mould and soaked the
foam with epoxy.

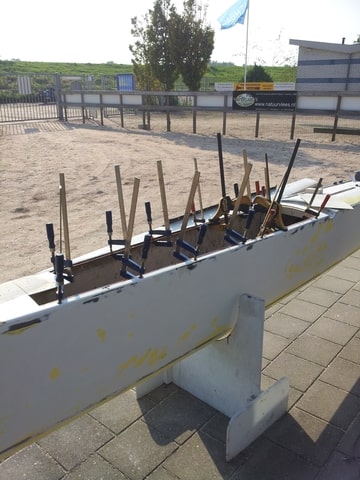
We did put the glas deck on the foam and pushed out all
the air between the layers.
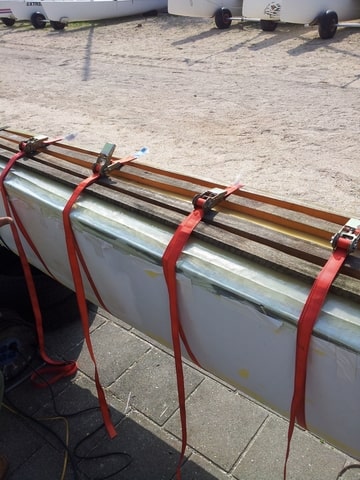
Next, we put some timber over the construction.
With straps, we created some slight pressure on the deck.
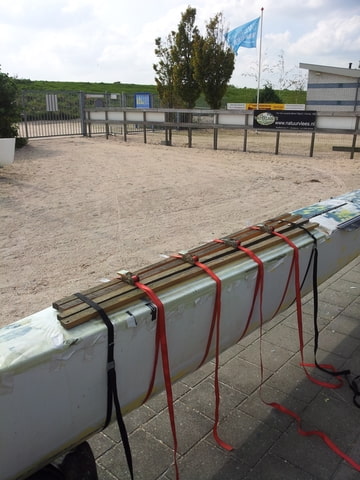
I'm going to see how it worked out tomorrow .
André
Edited by catmodding on Sep 13, 2014 - 08:22 AM.
André de Bruin, Amsterdam,the Netherlands
P 18-2
Andre, is it not better/cheaper/lighter/stronger to borrow aircraft technology & utilize a couple of ribs/stringers to give support vs thick enough glass?
When I was looking for a T, the decks seemed to be 1/4" ply, supported by a stringer every 16" or so. It would be VERY easy to make them using thin cardboard,(that's what Nacra used) wetted then overlayed with cloth.
Wet cardboard, fold into a "T" shape, with the vertical leg of the "T" a fold upon itself. You have then essentially built a structural beam, with a wide flange for the deck to rest on. If you now visualize the beam lengthways, you leave 4" extra of cardboard at each end. The extra can be folded 90* & serve to tab the beam to the inside of the hull. This can be done with the vertical leg of the "T", and the "arms".
Here are a couple of photos of an N5.2 hull. They used cardboard tubes to give rigidity. The actual decks are pretty thin.
 .
.
Edited by Edchris177 on Sep 13, 2014 - 04:34 PM.
E C Hilliard
Nacra 5.7
Bombardier Invitation
Edchris177 wrote: Andre, is it not better/cheaper/lighter/stronger to borrow aircraft technology & utilize a couple of ribs/stringers to give support vs thick enough glass?
.
Here are a couple of photos of an N5.2 hull. They used cardboard tubes to give rigidity. The actual decks are pretty thin.
Thank You Edchris,
This is interesting stuff and the cardboard tube trick, I will certainly
remember and try.
What I'm trying to do is rebuild the deck the way it was, using modern
materials. So, upperdeck, foam instead of balsa and underdeck.
5 layers of glass fiber soaked in epoxy is just over 3 mm, this is thin
for a upper-deck
The foam I use is also used in voilvo ocean racers, it can be put
into shape by pressure or with a heat-gun.
Today I finished the deck and weighted it, its just under 1900 gram.
In a few hours I will post some pics of yesterdays and todays work.
Regards, André
André de Bruin, Amsterdam,the Netherlands
P 18-2
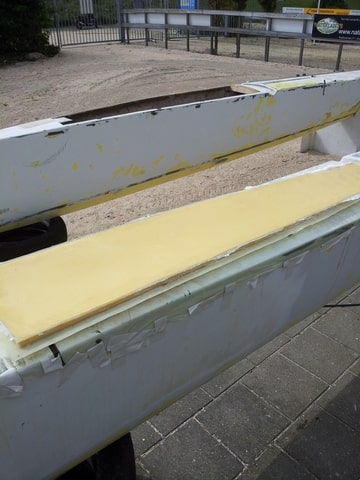
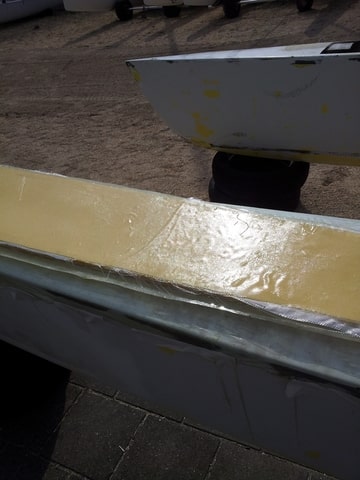
I left You all with a glass deck and 1 layer of foam.
This is the way it looked the next morning, lots more
strength but still flexible .

Time to cut out layer 2 and 3 of foam.
and soak them in epoxy.
And cure them on the " good " deck.
Next day there was a sturdy, stiff an hard deck, its weight is less
than 1900 gram !!
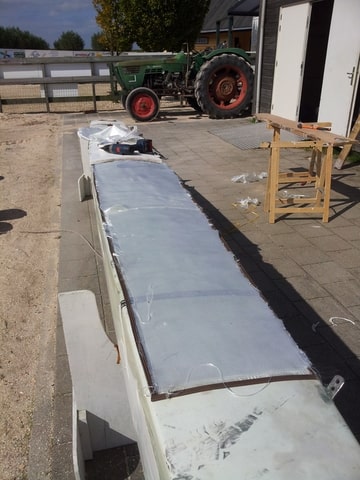
Then, we started preparing for the under-deck, 2 layers of glass.
This is layer 1, couldn't make foto's of the second, soaking gloves.
We started early today, so when the epoxy of the under deck
was sticky, we prepared the "bad" hull to glue the deck in.
Used some other epoxy this time, its thicker and foamy and
designed to bond pieces together.
Thats when my camera died on me, but we did the same trick,
timber and straps. Tomorrow this should be cured and the
"bad" hull has a deck again.
Keep you posted.
André
André de Bruin, Amsterdam,the Netherlands
P 18-2
Andre,
Great job documenting the repair. Did you have any stringers under the rotten foredeck when you remove it?
How thick was the deck that you removed? Like Edchris mentioned, mine has stringers about 16 inches apart and a 1/4 inch plywood deck. My plywood stringers have started to delaminate and I am thinking about drilling into them from the top,injecting epoxy, and then using stainless screws to pull them back together.
Any other ideas would be appreciated. Do not want to remove the decks if at all possible.
Pete
H18m
p16
Venture15
Pete,
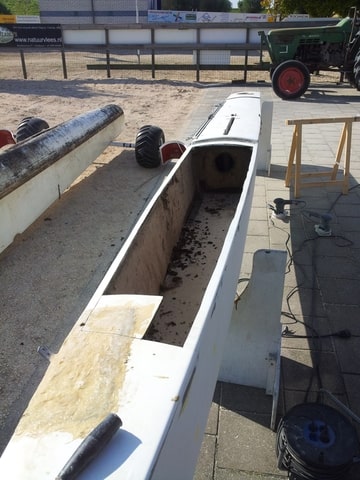
No stringers whatsoever, just a thin under-deck, balsa ( grain vertical )
and a epoxied deck with gelcoat. About 2 centimeters thick.
In the bottom of the hulls a tempex foam block.
Around the rear portholes theres som minor delam. Gonna take care
of that next season.
Removing front or rear-deck is do-able, depending on your space for
working on the cat.
The injection-method is something for next season, never have done that.
Season is closing overhere, just wanna sail this T before that.
pknapp66 wrote: Andre,
Great job documenting the repair. Did you have any stringers under the rotten foredeck when you remove it?
How thick was the deck that you removed? Like Edchris mentioned, mine has stringers about 16 inches apart and a 1/4 inch plywood deck. My plywood stringers have started to delaminate and I am thinking about drilling into them from the top,injecting epoxy, and then using stainless screws to pull them back together.
Any other ideas would be appreciated. Do not want to remove the decks if at all possible.Pete
André de Bruin, Amsterdam,the Netherlands
P 18-2
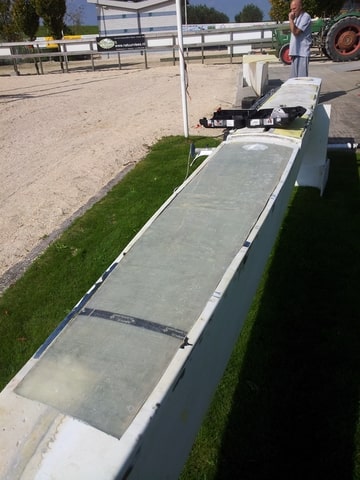
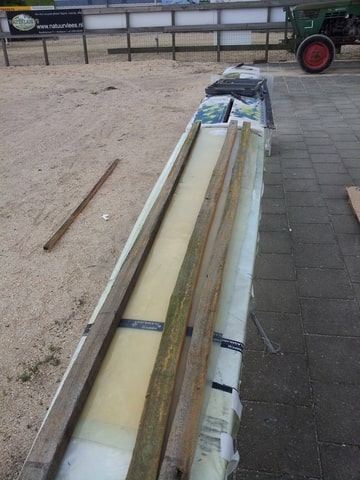
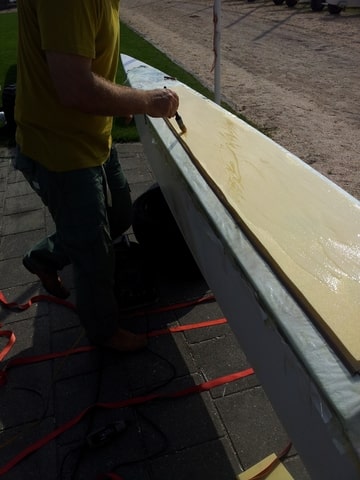
This morning, a surprise, A sturdy, stiff new deck

Its good, I can't push it in. It doesn't flex. Happy !!
The rest of the day we sanded the hull and put some
epoxy-putty here and there.
After clean-up we gave the deck a last layer of glass,
partly because the material was there, Partly because I
decided to save on gelcoat, which is next.

André
André de Bruin, Amsterdam,the Netherlands
P 18-2
Hi,
The weather is turning bad, 2 more days without rain, maybe 3.
So we decided to leave the deck as it is an started sand the hulls
300 grain.
After a few hours, two hulls ready for paint.
Tomorrow is paint-day.
André
André de Bruin, Amsterdam,the Netherlands
P 18-2

catmodding wrote:
Tomorrow is paint-day.
That's the fun part! Can't wait to see the result of all your hard work.
____________
Damon Linkous
Andre, in a couple of your posts you mentioned gelcoat, now you say you are going to paint, if you are going to paint I look forward to your documenting this as I will most likely be doing the same..... 😀
http://www.thebeachcats.com/forums/viewtopic/topic/15099/start/0#pid53075
The side of the hulls are going to be painted. The new deck gets new gelcoat
to get rid of the glas-fibre structure..
André
the-renovator wrote: Andre, in a couple of your posts you mentioned gelcoat, now you say you are going to paint, if you are going to paint I look forward to your documenting this as I will most likely be doing the same..... 😀
http://www.thebeachcats.com/forums/viewtopic/topic/15099/start/0#pid53075
André de Bruin, Amsterdam,the Netherlands
P 18-2
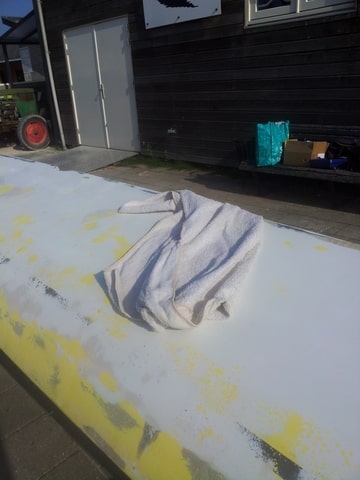
First day of paint.
I was early, so dried the hull with a cloth.
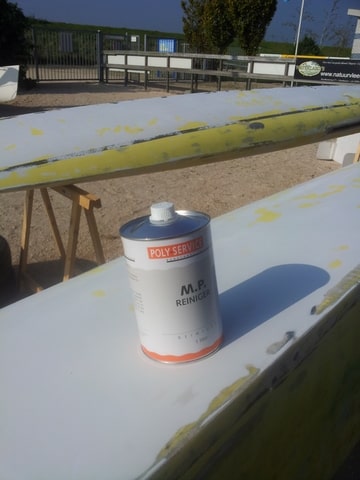
Then cleaned the hulls with a cleaner that came with the kit
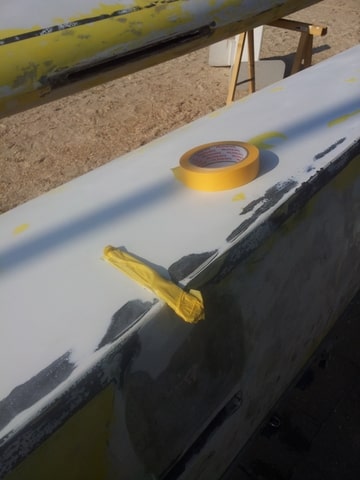
Taped the tangs
This is the set I used for paint, 2 component polyurethane
based. 5 sets are needed for the T.
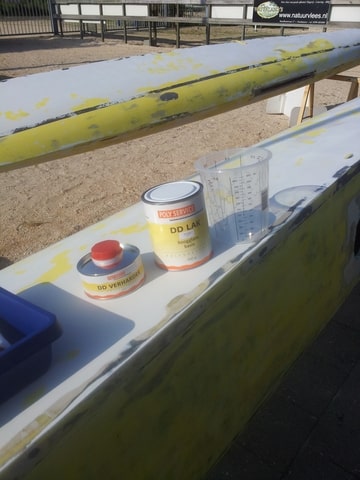
These cups are so handy !! Costs 0,60
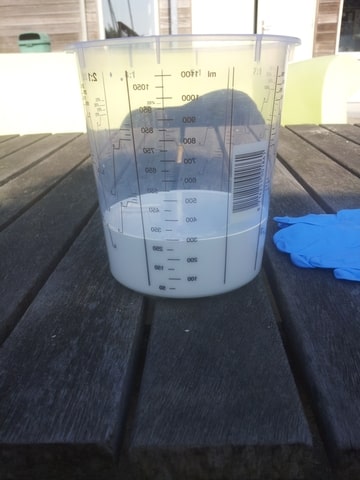
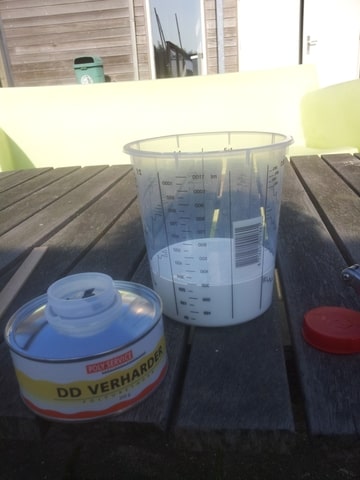
Ready to mix the hardener-compound
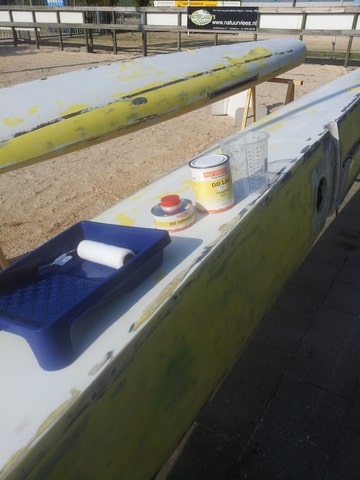
When mixed , its rolling time ! I use a lacker-roller and put on
the paint top to bottom first . Then without putting any pressure
on the roller, roll it bow to stern. Pot-life is 15 minutes !!
Not sure how to do this? Ask a professional painter.
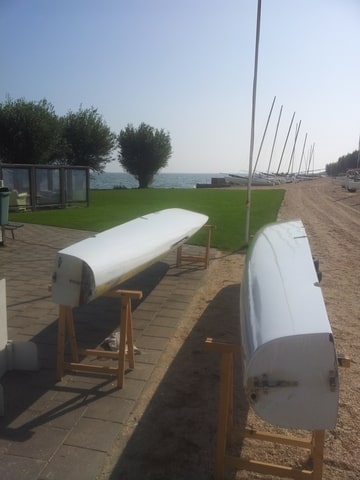
Arrived at 10.00hrs and 11.15hrs the job was done, what's left is curing
in the sun for hours.
Important !! Always paint in the morning, This paint needs at least
6 hours of curing before dew sets in.

Tomorrow, more paint.
André
André de Bruin, Amsterdam,the Netherlands
P 18-2
catmodding wrote:
Arrived at 10.00hrs and 11.15hrs the job was done, what's left is curing
in the sun for hours.
Important !! Always paint in the morning, This paint needs at least
6 hours of curing before dew sets in.
Did you move the hulls outdoors for the picture? Or did you paint out there? Seems like you would get a lot of dirt and dust blown onto the wet paint? That looks like a dirt road?
____________
Damon Linkous
Awesome Andre
Sorry, can't remove this..
André
Edited by catmodding on Sep 19, 2014 - 04:35 PM.
André de Bruin, Amsterdam,the Netherlands
P 18-2
Damon,
Did paint inside and took them out when the paint was dry.
The garage is to cramped and dark to take good pics.
DamonLinkous wrote: [quote=catmodding]
Did you move the hulls outdoors for the picture? Or did you paint out there? Seems like you would get a lot of dirt and dust blown onto the wet paint? That looks like a dirt road?
And its not a dirt road, the whole terrain of the club is paved
with crushed sea-shells, hardly any dust.
André
André de Bruin, Amsterdam,the Netherlands
P 18-2
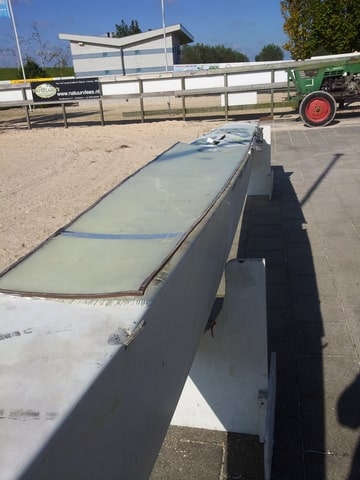
So left you with 2 shiny hulls. Was called away and left the hulls outside.
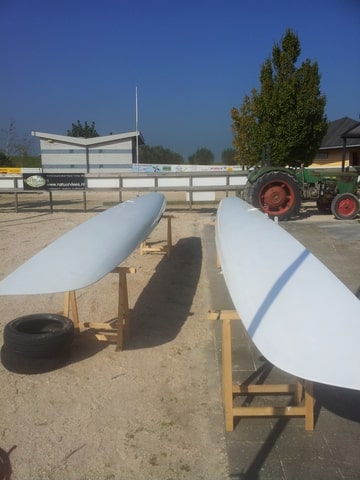
Had to work a couple of days and when I returned ..... Disaster !!!!!
The paint was mat and had crackles and bubbles at some places.
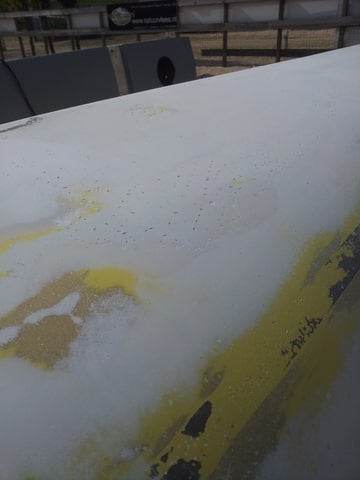
We started sanding again to discover a strange chemical reaction
which caused the old gelcoat to bubble.
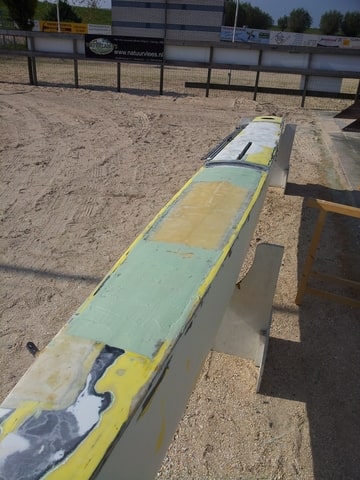
Out of frustration and to boost moral somewhat I painted one deck
so we could at least see what the result wil be in the end.
We sanded € 60,00 worth of paint away. 😡
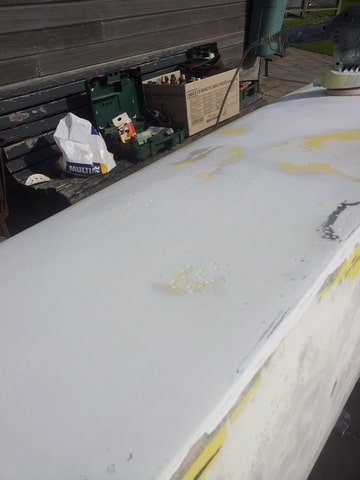
And started filling the bubble-holes with putty
And faired the complete hull.
Next is a primer to separate the old gelcoat from the new paint.
Then is paint , version 2.....
What a frustrating period, keep You posted.
André
Edited by catmodding on Sep 24, 2014 - 02:51 PM.
André de Bruin, Amsterdam,the Netherlands
P 18-2